Instead of reading you can watch a localization tutorial video!
Note
Before you start working on localizing Crea into your own language check out the official CreaLocale github repository. There you can help contribute to an existing localization or help start a new one that could eventually be included in the game officially.
Creating new localizations in Crea is easy. Start by copying the current en.locale and renaming the file with the correct language code such as Japanese would be ja.locale. Open this file in a text editor and update the locale’s name in setup(). You may also need to update the locale’s fonts.
Next open the settings file in the same directory as Crea.exe and change the localizer entry to be the path of your new locale file.
"localizer": "C:\\dev\\CreaLocale\\locale\\ja.locale",
Now you are ready to get started with the Localizer!
There is a localization tool built into Crea (load up a world and press P key) that makes the entire localization process much easier by allowing you to filter, edit and preview localization entries. This tool, “Localizer”, displays all localization keys by their category and allow for easy filtering.

New versions of Crea can contain changed locale entries or entirely new ones. These outdated entries are designated by a “!” and the overall progress for localizing a category is displayed next to the category. When starting a new localization all entries are considered outdated.
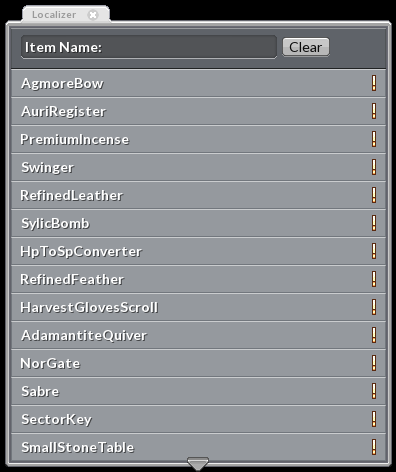
Clicking on a category will filter all entries by that category. Filtering can be done manually by typing into the edit field on the top. There are just a few things to know about this. The entries will filter by their locale key. If the filter includes a : then the first part is the category name to filter by with the second part being the locale key. Finally you can filter to only show outdated entries by including a ! anywhere in the edit filter.
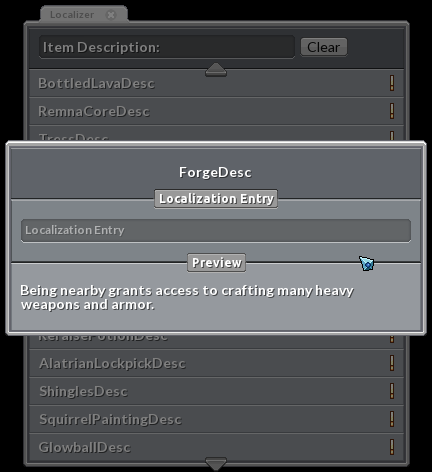
Clicking on an entry will bring up the edit and preview window. Through this window you can edit the locale entry. In the preview section you can see the original text along with a live preview of your localization. This preview reflects what it will look like in game including line width. To close this dialog simply click outside of it and your entry will be automatically updated. The localizations will be saved to file after every 10 edits or whenever you close the localizer.
The default game fonts do not support all language characters which results in them not being rendered properly. This can be fixed by supplying your own fonts and specifying them in your localization file using font(). The Localizer will use your fonts when displaying localized text.
font("bitter_italic", "../ui/fonts/NotoSansMonoCJKjp-Regular.otf")
This will change all ‘bitter_italic’ text to use the font NotoSansMonoCJKjp-Regular.otf which supports Japanese characters.
In order to test out your localization in game or if you want to release your localization as a mod then you can download an example localization mod here.
The locale file holds all of the game’s text. The first time this is created you will want to adjust the setup information but after that you generally you do not need to change this file directly.
setup(name, useWordWrap=False)¶This initializes the locale file with some basic information.
| Parameters: |
|
|---|
font(key, path)¶All of the game’s text use font keywords to determine which font it should use. This allows you to change which fonts to use when your localization is active.
| Parameters: |
|
|---|
locale(key, value, category='', uid=0)¶Adds a new entry to the localization.
| Parameters: |
|
|---|
associate(key, existingKey, value, category='', uid=0)¶Adds a new entry to the localization and connects it’s Description and Flavor entries to it.
| Parameters: |
|
|---|
link(existingKey, key)¶Links a locale key to an existing entry to avoid duplication.
| Parameters: |
|
|---|